As a laundry doer, dryer vent cleaning is something you only consider once your dryer starts taking too long to dry your clothes.
Or, even worse, when your dryer vent becomes clogged with lint and your dryer stops working.
And lastly, you might even have the terrifying scenario where your dryer smells like it’s burning.
Regardless of your scenario, when your dryer quits, dryer vent cleaning morphs from an afterthought to a top priority.
So, If you’re reading this, you are most likely a laundry doer with a clogged vent and a case of the dryer vent cleaning blues.
But have no fear! These tips will get you back in action in no time at all.
First, let’s start with the five most common places for lint to block your vent pipe.
Cleaning Your Dryer Vent In The 5 Most Common Problem Areas
The lint trap catches most of the lint immediately after it leaves the dryer barrel. Which, in turn, prevents the lint from clogging the vent.
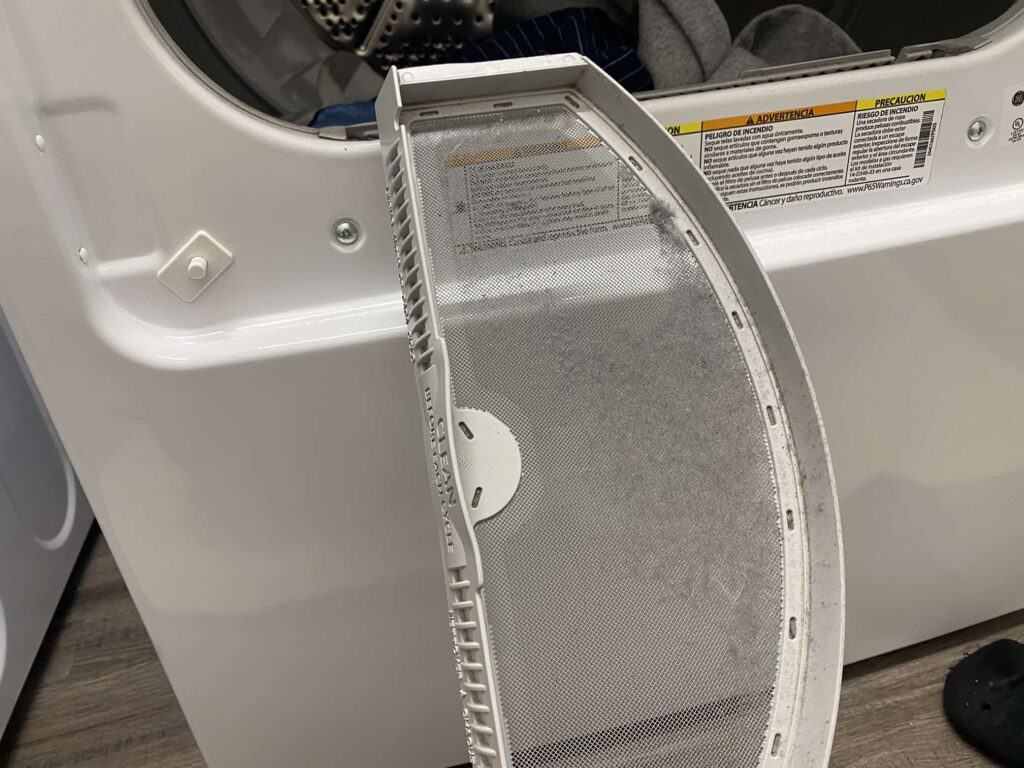
1. How to clean your dryer lint trap
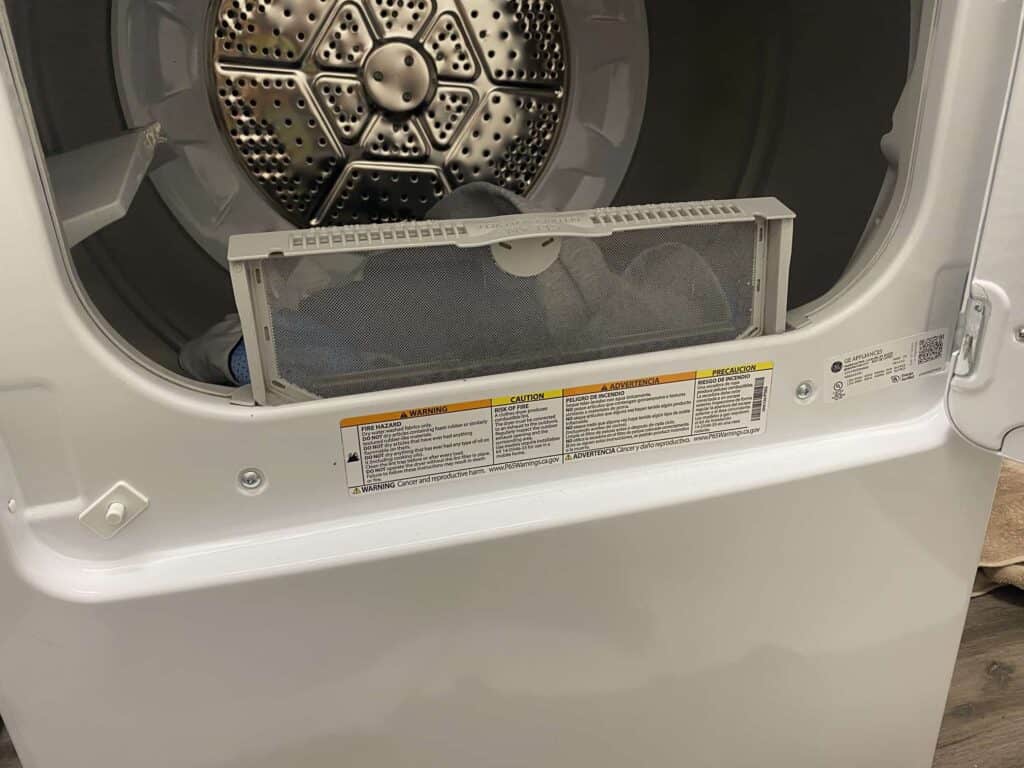
The lint trap is the most common place for a dryer vent to clog up, as a result, cleaning your lint trap after every load of laundry would be best.
Not only will your dryer operate more efficiently, but you’ll also prevent the development of more significant problems.
How to clean your lint trap:
- Remove the lint trap from the slot in the dryer. Most of the time, you can find your lint trap located at the bottom of the dryer door opening.
- Peel the lint off of the trap with your hand.
- Insert the the trap back into the slot.
Easy-peasy!
2. How to clean the connection pipe between the dryer and the wall.
The connection pipe connects the dryer to the vent pipe in your wall.
In most cases, builders and big-box store appliance installers use the wrong materials when they install connection pipes. Furthermore, connection pipes often are not installed correctly.
As a result, they clog up! Fortunately, cleaning your dryer connection pipe is an easy DIY job.

Steps to clean the connection pipe:
1. Slide the dryer away from the wall.
2. Remove the connection pipe from the dryer by loosening the clamp with a screwdriver. Or, if your dryer has a tension clamp, squeeze the end of the clamp.
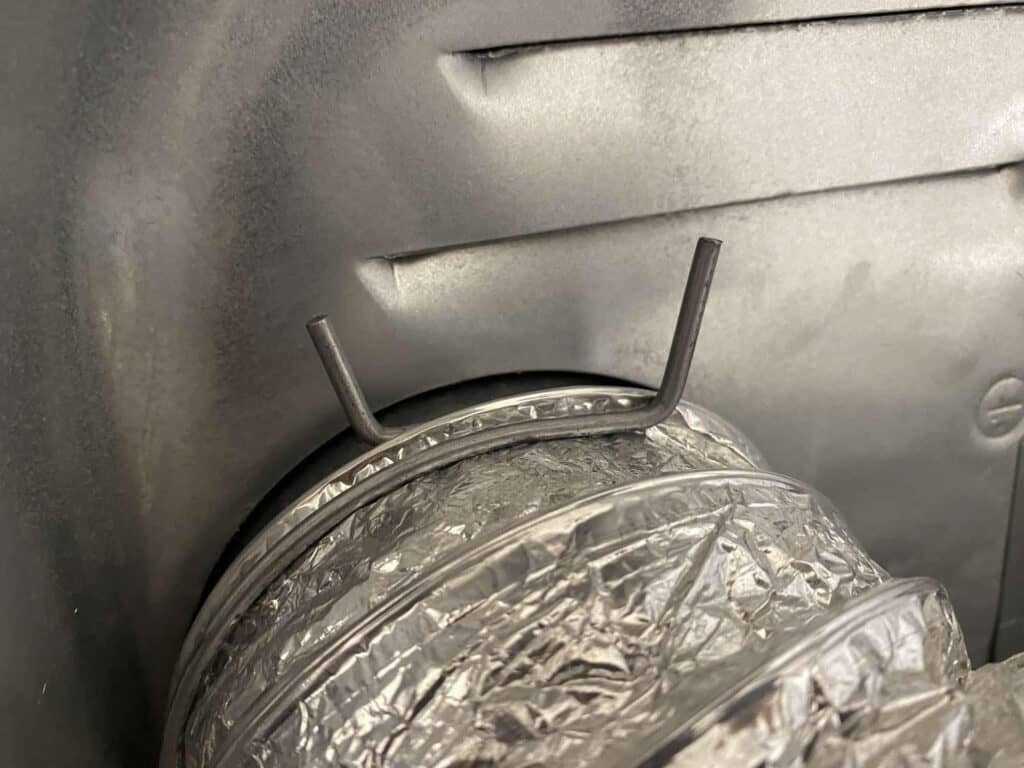
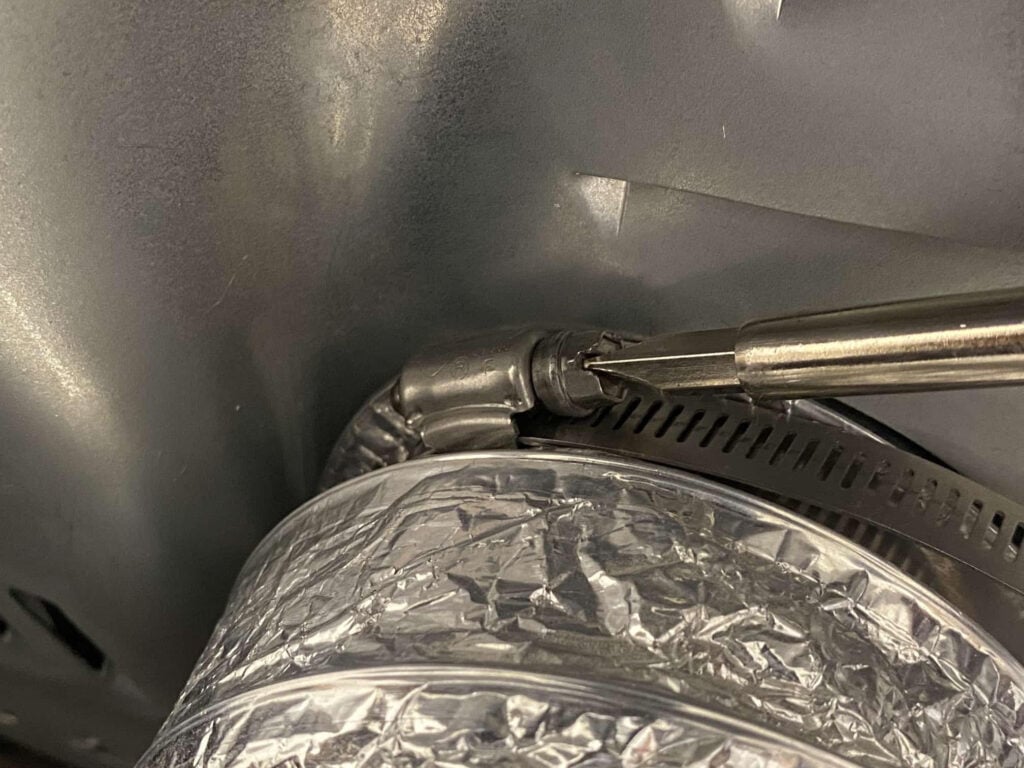
3. Remove built-up lint in the connection pipe by hand or with a vacuum cleaner.
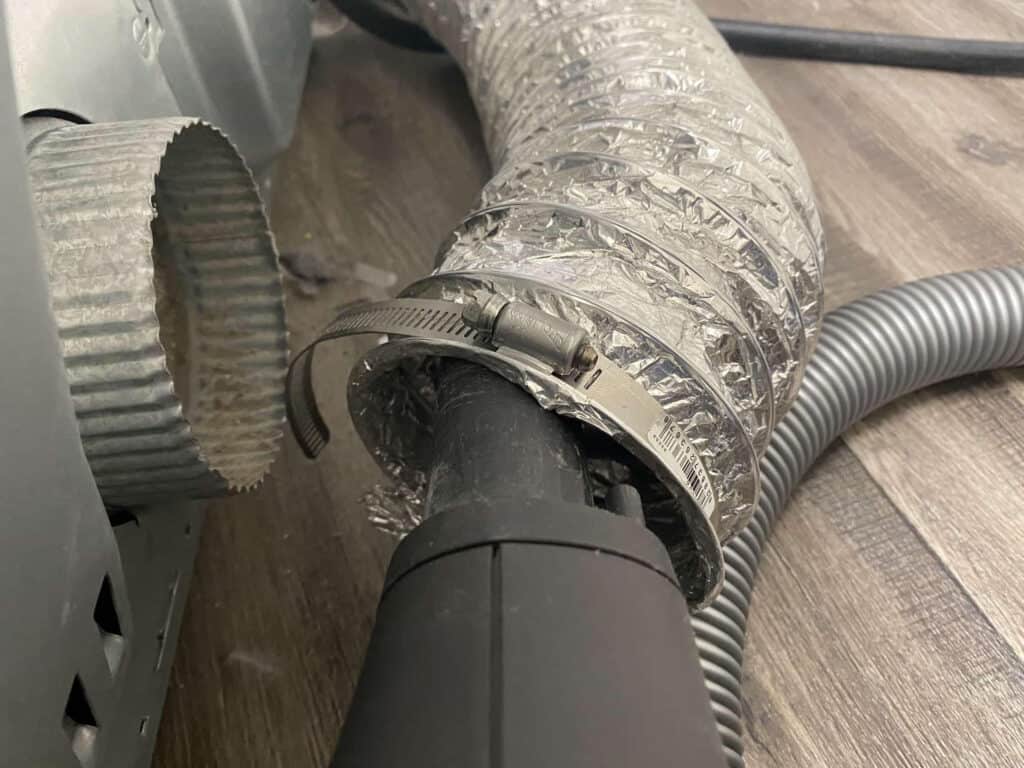
4. Reinstall your vent.
After you clean your connection vent, you should clean the elbow inside the wall before you slide your dryer back in place.
3. How to clean the dryer vent duct elbow inside the wall.
When air leaves your dryer it travels through the connection duct and into the wall.
After it enters the wall, it makes an immediate 90-degree turn and runs up or down the wall cavity. This turn is called the wall elbow or duct elbow.
Its common for lint to build up in the wall elbow.
Fortunately, cleaning the dryer vent duct elbow is an easy DIY project.
So, if you are already cleaning the connection pipe while you have access to the back side of the dryer, you should also clean the dryer vent elbow inside the wall. It only takes a minute!
Steps to clean the dryer vent elbow:
1. Follow steps 1-3 in the previous section.
2. Remove the connection pipe from the wall.
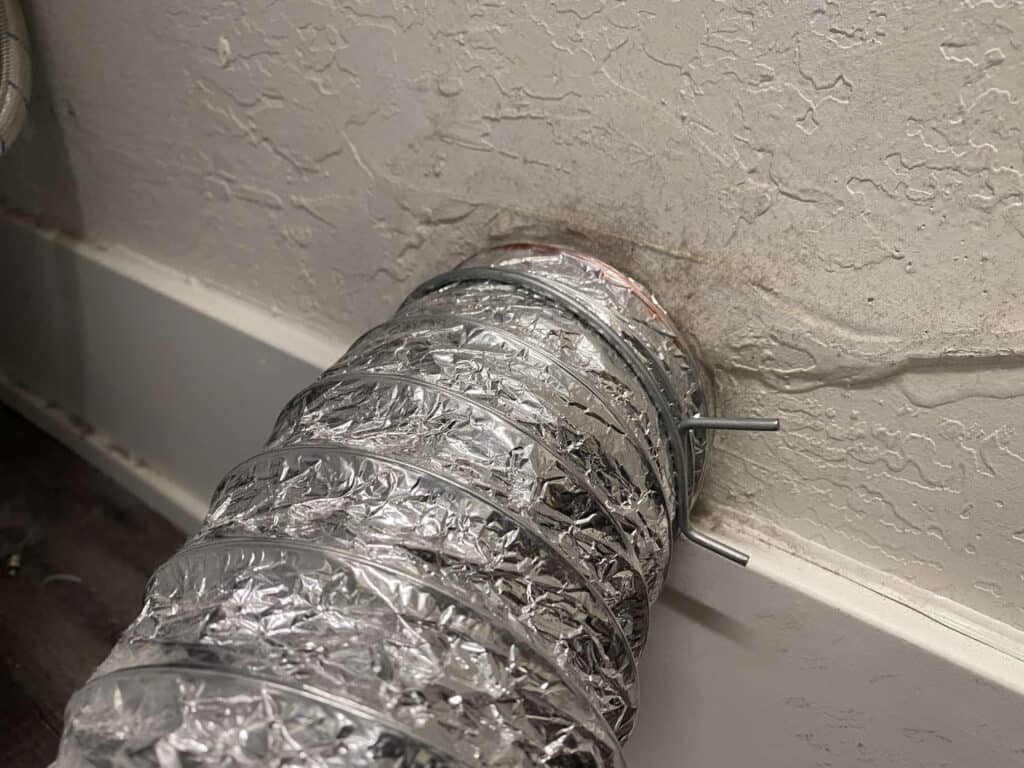
3. Clean the lint out of the elbow in the wall with a vacuum.
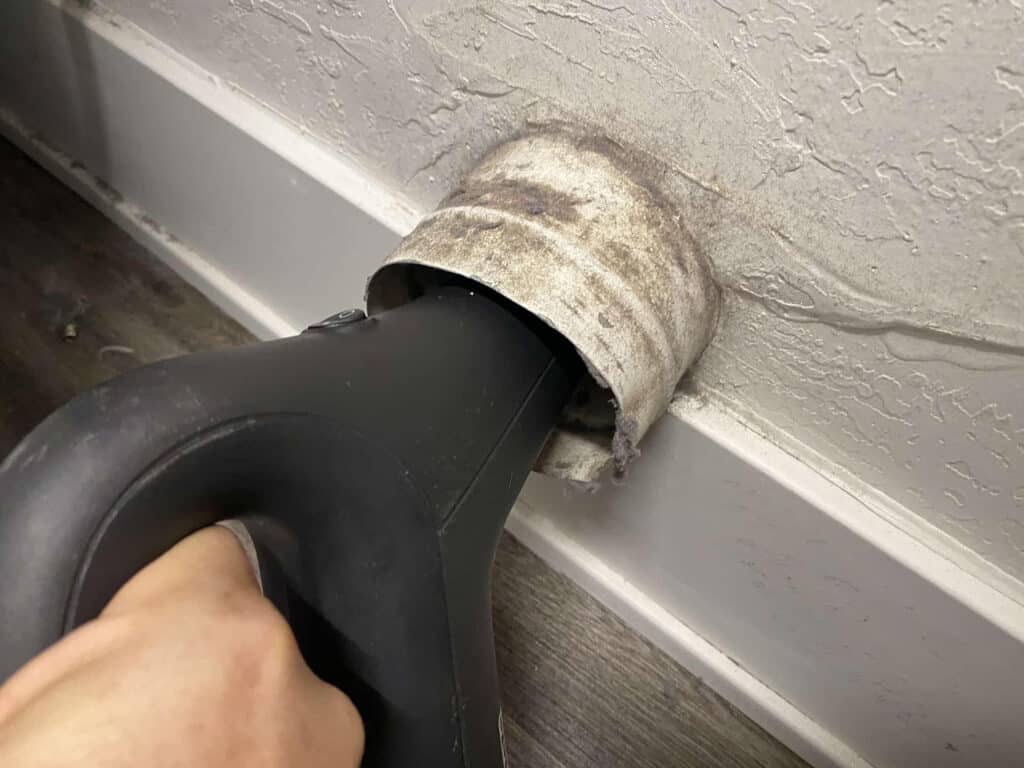
4. Reinstall your vent.
After you clean the connection pipe and the elbow inside the wall, the next step is to clean the exterior exhaust vent cover.
4. How to clean the exterior exhaust vent cover.
The final location in the dryer vent duct where it’s common to see clogs is where the dryer exhausts to the outdoors.
The exhaust vent is on your exterior wall near the laundry room or on the roof above the laundry room.
Here’s how to clean the outside wall-mounted or roof mounted vent cover:
- Remove any screens or plastic housings that cover the vent.
- Clean the screens.
- Remove lint build-up from the dryer vent pipe by hand. Or, use a vacuum cleaner hose to clean the lint build-up inside the pipe.
- Remove any observable lint build-up by hand if your dryer vents out of the roof. However, if you don’t have experience with roofing or cutting ducts and repairing them, hiring a professional to remove lint build-up in the duct section close to the roof is best.
Now that you’ve cleaned the entire vent, the next step is to clean the blower in the dryer cabinet.
5. How to clean the blower in the dryer cabinet.
Occasionally, lint will clog up in the blower of your dryer cabinet.
Cleaning the blower motor is more complicated than cleaning the vent pipe. However, it’s still a relatively easy project for a handy homeowner.
- Remove the back panel of your dryer.
- Follow the cleaning steps in this YouTube video.
If You Clean All 5 Spots And Still Have A Clogged Vent:
Occasionally, lint will block your vent in a hard-to-reach area inside your wall. In that scenario, you’ll need a dryer vent cleaning kit to clean it yourself.
Dryer Vent Cleaning Kits – A DIY Solution
In most cases, when you do DIY dryer vent cleaning, you do not need a kit or specialized tools.
As you can see in the prior five examples, all you need is a vacuum and a screwdriver.
However, a dryer vent cleaning kit is necessary if the clog is in an area you cannot reach by hand.
What does a dryer vent cleaning kit include?
Typically, a dryer vent cleaning kit is a brush on the end of a 24″ long plastic wand. The equipment package often has several plastic wand extensions to reach farther into the vent.
To use the kit, you attach the wand to a drill to brush out the lint in the vent.
However, some kits do not have a drill attachment option. In this scenario, you use your hands to operate the brush.
How to clean your dryer vent with a kit:
- Attach the brush to your drill and insert it into the vent pipe
- Extend the wand into the duct by pulling the trigger on your cordless drill while gently pushing the attachment.
- Set your vacuum hose in the vent pipe to create airflow. Airflow makes it easier for the brush to dislodge the lint.
- Move the drill back and forth slowly while spinning the brush.
- After you remove all the lint from the vent, slowly retract the drill while spinning the brush.
Important Tips
- Keep the brush spinning at a consistent speed when you push it in or out. Maintaining the shaft at a constant rotation speed will make the wand less likely to snap inside the vent.
- Avoid using extensions.
- The more attachments you attach to your brush, the more likely it will break inside the vent. So, it’s best to use only one extension. But if you use more, exercise caution!
Positives of Dryer Vent Cleaning Kits
If lint is building up in the vent pipe within a couple of feet from where the vent enters the wall, you can save time and money by cleaning it yourself.
You only need a drill and a dryer vent cleaning brush (kit).
Negatives of Dryer Vent Cleaning Kits
The primary risk of using a dryer vent cleaning kit is having the brush break off in the vent. Both kits operated by hand or with a drill are prone to breaking in the pipe.
When this happens, removing the broken brush is time-consuming and costly.
Why do kit brushes snap so easily?
Commercial dryer vent cleaning kits cost over $1000. Most of that cost is durable extensions that will not break in the vent.
However, commercial-grade cleaning kits occasionally snap inside dryer vents, even with vastly stronger shafts.
So, you should only use a DIY kit for the lightest tasks. Inexpensive extensions cannot handle the forces put on them in the vent pipe without snapping.
When your brush breaks
If the brush breaks in the vent, you’ll have to hire a dryer vent cleaning service to remove the brush. At a minimum, this will cost you $500 because removing a broken brush is much more complicated than cleaning a vent.
Additionally, if the contractor needs to remove sections of drywall and vent pipe to reach the broken brush, the repair costs skyrocket quickly.
Final Thoughts On Vent Pipe Cleaning Kits
Dryer vent cleaning kits are great for a DIY homeowner in some situations. You can save time and money cleaning the vent independently, especially if your dryer ducts need regular cleaning.
However, if you need to clean lint lodged deep in the vent, you’re better off calling a professional.
5 Reasons Why Dryer Vent Cleaning Is A Temporary Fix
If you install and use your dryer correctly, your dryer should never clog with lint.
Consequently, if you are cleaning your dryer vent, it means something is wrong, and the vent will clog again.
So, if your vent is clogged, you have one or more (usually more!) of the following underlying issues.
1. Your dryer vent is too long or has too many turns
Every turn in a duct vent reduces air speed and air pressure. So, the fewer turns you have in a pipe, the better.
Manufacturers design a dryer to function correctly with a 30′ long straight vent.
As a result, a dryer vent design rule of thumb is that every 90-degree turn in the dryer vent reduces the functional length by 5′.
For example, if your dryer vent has three 90-degree turns, its functional length will be 15′.
Unfortunately, most dryer vents have three or more turns. As a result, they clog with lint.
Solution: Redo the vent so there are fewer turns.
2. Your dryer vent has a creased, collapsible surface
Most dryer vents have a flimsy, collapsable surface in the connection point between the dryer and the wall.
While these vents are cheaper and easier to install, they create air turbulence in the flue. Additionally, the bumps serve as catch points for lint to start building up.
3. Your dryer vent is compressed/crushed.
Soft, flexible dryer vents are cheap and easy to install. But they are easily compressed or crushed.
When you reduce the vent size due to compression, it creates a choke point that lowers the air pressure and speed throughout the rest of the vent.
Furthermore, the compressed area is a place for lint to build up.
Solution: Carefully install your flexible vent connection to maintain its proper shape. Better yet, replace the soft vent with a rigid metal vent.
4. There is a screen covering the dryer’s exterior exhaust.
Many exterior exhausts have a screen covering the exhaust to prevent birds, rodents, and other critters from entering the vent.
Unfortunately, screens slow the pipe’s airflow and provide a lint catch point. After lint builds up, the air in the line slows down even more. As a result, lint begins to build up at other choke points in the pipe.
Solution: Clean the screen regularly. Better yet, replace the screen cover with a gravity-operated flap cover. The flap opens when the dryer is blowing but remains closed when the dryer is off.
5. You don’t clean the lint trap after every load.
Cleaning your lint trap after every load of laundry keeps the air flowing into your dryer vent moving at top speed. Which, in turn, prevents lint build-up in the vent.
Not only that, it helps your dryer dry your clothes much faster.
Solution: Clean your lint trap between every load!
7 Dryer Vent Cleaning Benefits
1. Prevent dryer fires
According to a 2020 study on dryer fires published by the National Fire Protection Association, fire departments in the United States fought a yearly average of 13,820 house fires that started in a dryer or dryer vent.
Lint combustion in the dryer vent caused 32% of the fires. Furthermore, overheating dryers due to an inability to blow heat down a clogged vent generated an additional 27% of the fires.
As you can see, keeping your dryer vents clean significantly reduces your chances of a dryer fire.
2. Extend dryer life
The more you restrict your dryer vent with lint, the harder your dryer has to work to push air down the vent hose. As a result, your dryer will have more wear and tear, which can take years off of its lifespan.
When you clean your vents, your dryer doesn’t have to work as hard. Consequently, it’ll last many years longer than a poorly maintained dryer.
3. Energy savings
Cleaning your dryer vents reduces energy usage because a dryer that does not have to work as hard uses less energy.
4. Your clothes dry Faster
When your dryer vent blows air at peak efficiency, it exhausts more humidity. As a result, your clothes will dry more quickly.
5. Stop mold growth
Mold growth in dryers is always a result of poor ventilation. Poor ventilation increases humidity, which, in turn, creates an optimal environment for mold growth, especially if humid air remains in the dryer between loads of laundry.
6. Increase air quality
When you restrict your dryer vent with lint, the increased air pressure forces air out of leaks in the dryer and the vent. These leaks carry lint with them, which decreases the air quality of your house.
7. Stop carbon monoxide
If you have a poorly ventilated gas dryer, you increase the risk of carbon monoxide build-up in the air.
However, since you’re not running your dryer constantly, a poorly ventilated dryer is unlikely to reach the level where it’s a life safety concern.
However, regularly breathing in even slightly increased levels of carbon monoxide is unhealthy.
Therefore, if you suspect your gas dryer is leaking carbon monoxide, open the doors to your laundry room to allow fresh air circulation. After that, only use the dryer once a professional inspects it and lets you know it’s safe.
Final Thoughts
It can be a major inconvenience when your dryer vent clogs up, and you can’t dry your clothes. Luckily, most clogs in your dryer vent are easy to clean so that you can be back up and running quickly. And you can prepare to permanently fix your dryer vent problem before the vent clogs again. In the meantime, enjoy your break from doing laundry!


